
Note: If you registered before 16 October 2017 and have not yet done so please reset your password. Reset
We have switched over to a new website platform which will allow us to vastly improve the service offered by The Talent Bank.
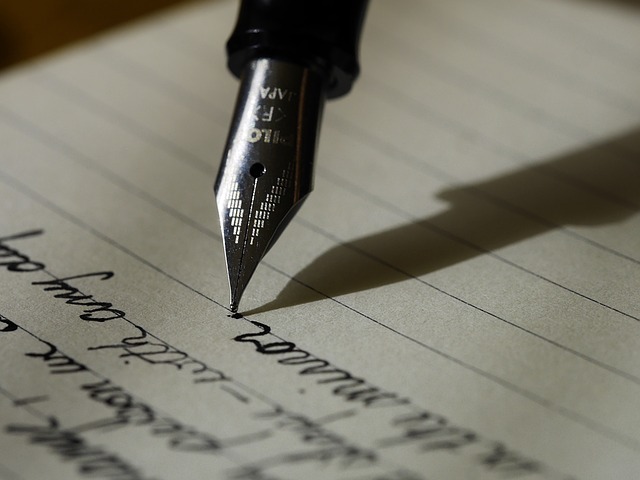
Learn Calligraphy for Beginners
Since the early days of mankind, we have used written communication in the form of pictures and symbols to create an entire language.
To this day, there are still many locations around the world in which to find original cave paintings dating back hundreds of years, all of which form their own narrative through simple drawings and symbols.
This beginners guide to calligraphy along with some awesome online calligraphy resources will teach you all you need to know to start honing your skills.
The art of writing
Literacy was once a privilege reserved for those lucky and rich enough to obtain it. During the middle ages, monasteries were the only source of education, thus, most of the manuscripts of that time were religious in nature and used to preserve the traditions and beliefs of the people who created them. The writers of these manuscripts were early calligraphers.

Although calligraphy was widely popular in western civilization, this art form has a rich history that spans Middle Eastern and Asian cultures as well. Chinese and Arabic calligraphy styles are very different from those practised in the west and require an extensive knowledge of the languages and their long histories. Each school of calligraphy has its own unique set of rules that have been passed on from generation to generation, and often, these rules are based on a particular font.
Blackletter or Gothic script emerged in the Northern parts of Europe during the 12th century and has dominated western calligraphy for several centuries. It was the font used in the first printed book in history, the Gutenberg’s Bible. The invention of the printing press reduced the need for hand-written books and marks a crucial point in history: the decline of calligraphy. However, the art of writing survived and from the XIXth century onward, it found its rightful place in the world of the arts.
Modern calligraphy
With the popularization of computers, calligraphy found a home in the world of graphic design. Not only are we able to create new, modern fonts using the latest technologies, the internet also provides easy access to historically styled fonts that are currently enjoying a comeback in trend.
The most important aspect of the basic rules of calligraphy is the alphabet. Although you can learn Arabic or Indian calligraphy techniques, it will require, at the very least, basic knowledge of the language.
In Chinese tradition, the best way to learn different styles of calligraphy is by using copybooks that include regular, cursive, running and calligraphic scripts. Original copybooks are in Chinese, but there are copy sheets available online that will allow you to replicate the style in your chosen language.

A good place to start is by practising Faux Calligraphy as it doesn’t require a specific brush or ink. You can simply use a ballpoint pen, chalk or even a marker to effortlessly create stunning lettering.
Before we go any further, let’s take a look at the tools – or “Four Treasures of Study”, as the Chinese call them – you will need to get started.
What You Will Need to Do Calligraphy
The tools you use to create a work of art will inform the artwork you are producing. It is vital to have the best possible pens but you also need to know which tools are the most adequate for the task you are facing.
Pens
The four most commonly used pens in calligraphy have flat, round nibs or two nibs that are used for special decorative purposes.
Felt tip pens are the easiest to practise with since they are affordable and do not require the preparation of ink prior to use. Felt tip pens will help you build your confidence in the beginning stages of your calligraphy practice, but they do tend to soak through the paper at times, which can result in a messy look. Be sure to use felt pens only for practising purposes and move on to more advanced tools once you are ready to try something more refined.
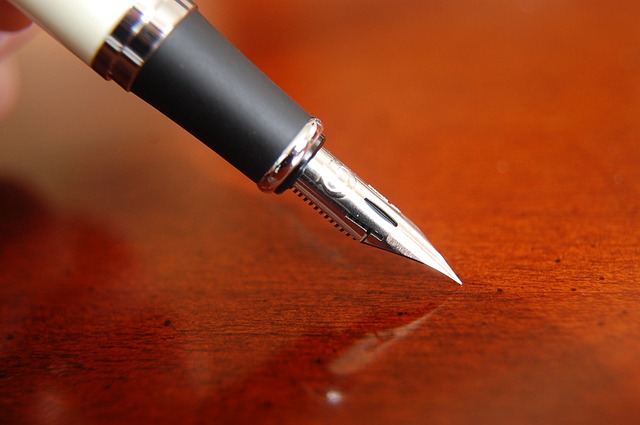
Once you feel confident in your calligraphy skills, you can move on to working with fountain pens. Fountain pens offer different style possibilities seeing as the nibs can be changed and ink cartridges are easily replaced.
A dip pen is perhaps the best choice for experienced calligraphers as it demands a high level of skill and precision. It consists of three crucial parts: the handle, the nib-holder or shaft, and the metal made nib. The nib’s reservoir stores the ink and releases it through a slit. Most dip pens have small reservoirs that can hold just enough ink to write several lines. A dip pen leaves almost no margin for error and can be messy if not used properly, so make sure you have perfected your practice before attempting to work with this advanced tool.
Brush pens are entirely different from pens with nibs and take some time to adjust to. Pressure to the surface will result in thicker lines, hence they demand a lot more practice than normal pens as complete control over your hand is an absolute requirement. These thin, nylon brush-heads are approximately 6 to 20mm wide and are used by dipping the brush into the ink.
Selecting the pen that best suits you and the style you are looking to accomplish can take some time, so experiment with different pens until you find the one that works best for you then you can look t become an accomplished calligrapher.
Ink
While you are still in the practising phase you might want to stick to black inks and leave the colours for when you gain more experience. For best results, you should only buy ink that is specifically designed for calligraphy.
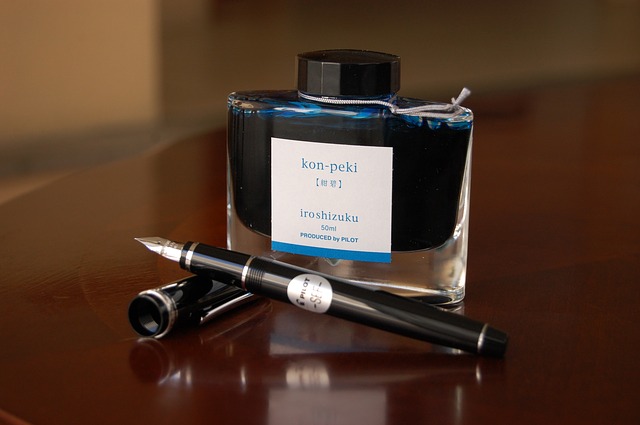
Selecting the ink you are going to use comes down to personal choice, but some brands have certain qualities that can make it difficult to concentrate on what you are doing. India Ink, for example, may coagulate over time which can be rather frustrating. Although India ink and Sumi ink look almost identical, there are some minor differences that clearly work out in Sumi ink’s favour.
Winsor & Newton are the most famous calligraphy ink manufacturers and their products can be found in most art supply stores where someone will always be available to offer you advice on which ink to purchase.
Paper
Your choice of paper should be based on the style of calligraphy you are looking to create, but generally, you will want to find some calligrphy paper that absorbs less ink and avoid those that will cause the ink to bleed.
It is not always easy to find paper and ink that match, so it is important to go through a few test rounds. You can start out by printing a practice worksheet on 32-pound LaserJet paper, which is generally non-absorbent.
For commercial purposes, any kind of watercolour paper is convenient since the ink won’t bleed, leaving you with elegant, tidy results. You may also want to try Rhodia, Clairefontaine, or Tomoe River papers and see which one best suits your needs.
As is true for every art form, it is important to explore and experiment in order to establish which tools will yield the desired effects.
Inkstone/Inkwell
Back in the day calligraphers relied on inkstones, but these days you can craft an inkwell out of a recycled plastic or glass jar. The actual bottles ink is sold in may look attractive to use as inkwells, but unfortunately, they are rarely wide enough for you to comfortably dip your pen in to. Keep your eyes peeled for glass jars to use as an inkwell and just be sure that the jar’s opening is wide enough for easy pen/brush dipping.
The importance of being patient
Once you have selected all your tools, it’s time to start practising. The first and most important step to practice is the strokes. Each letter is painted with one stroke at a time. Western, Chinese or Islamic calligraphy has its own unique and precise stroke order and takes a lot of practice to memorize.
Over time, you will build muscle memory and these strokes will become almost automatic. The pen you are using will determine how your letters will look. It takes a lot of practice and experience to learn which pen to use for any given assignment, but that is exactly what makes the art of calligraphy so unique.
The way you hold your pen is of utmost importance. Most calligraphy techniques require you to hold the pen at a 45-degree angle, while others are best practised standing up and holding the pen at a 90-degree angle. If your ink is bleeding, you should try to adjust the angle at which you are holding the pen, as your hand’s position may be causing the pen to release too much ink onto the paper.
The repetition will turn into a meditative practice – and that is exactly how you should approach calligraphy. It is a form of meditation and the more you do it, the more in tune you will become with the practice itself. Calligraphy is a practice in patience – it is an art focused on detail, and the more meticulous you are in your approach to it the more skilful you will become. As the famous calligrapher John Stevens once said:
‘Experimentation is work without expectations. There is no predetermined outcome. We flirt with surprise or disaster. And if we are clever, we spot when we have done something new and interesting, and harvest it and own it.’
 How to Write Poetry For Beginners: Easy if You Know How
 The Best Acoustic Guitars in the World
 9 Super Creative Street Art Pieces
 The 10 Greatest TV Shows of All Time
 How to Play Guitar for Beginners