Note: If you registered before 16 October 2017 and have not yet done so please reset your password. Reset
We have switched over to a new website platform which will allow us to vastly improve the service offered by The Talent Bank.
100+ Creative Personal Art Project Ideas

Thinking up unique personal art project ideas can be surprisingly challenging.
You know you want to do something creative but you are just not sure what!
We have all been there, in the same way a writer can get writers’ block, an artist can struggle to find inspiration for their art.
But fear not:
The Talent Bank is here to help you overcome that creative block!
To help you get the creative juices flowing, we asked our members to come up with some creative art projects ideas. We ended up with over 100:
1. Rain painting
All you need is:
- Piece of thick paper or card
- Paint
- A rainy day
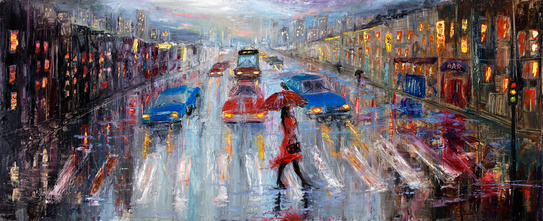
Many artists have made their name painting the natural world and there is a certain beauty to a rainy day. What better way to capture that beauty than to create a painting? Look out of the window and paint the view as the rain pours, or be a little more adventurous and go outside to your favorite place and paint it in the rain you can even let the rain land on your paper as you try to paint and see what the effect is.
2. Wall mural
Create a nature picture in your home with a beautiful wall mural. Section off an area of a wall you wish to decorate, cover with plain wallpaper lining and create a border, either with paint or leaves or twigs.
Then go for a nature walk with a basket and collect anything interesting you see along the way to take home. Then create your own indoor mural which you can also change along with the seasons. Add some glitter spray for extra sparkle!
Learn more: https://www.art-is-fun.com/mural-techniques
3. Zen garden
This is a moving piece of art that is not only fun to create, but it also clears your mind and allows your inner creativity to flow…
All you need is…
- A small tray (or cardboard box)
- Some sand
- Rocks or crystals
- A fork or mini rake
Simply fill the tray or box with sand and place in the rocks and crystals then take a deep breath and create images and patterns in the sand or create whatever comes to mind or out of your hands.
This traditional Buddhist art practice is said to show the artist that everything is temporary and everything can change, be destroyed and rebuilt. It’s a lovely art project to clear the mind.
4. Make a mandala to color in
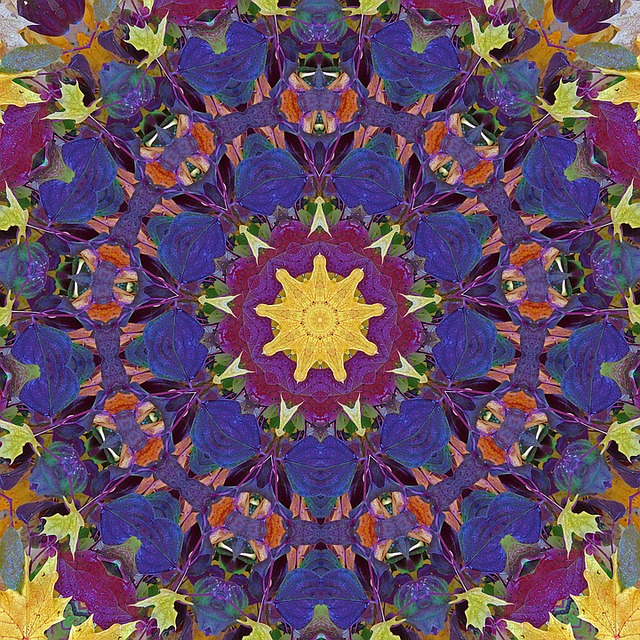
Colouring in is no longer in just the realm of children, grown-ups everywhere are embracing this peaceful art practice. Take this to another level and create your own designs to color in.
All you need is:
- Paper
- Black fine pencil
- Optional – Compass and ruler
You can do this freehand, or you can create perfect shapes and circles to create your mandala. Maybe even try searching for images online for inspiration.
When you have finished, make a few copies so you can color it in and share it with friends.
Learn more: https://design.tutsplus.com/tutorials/art-therapy-how-to-draw-a-mandala–cms-29570
5. Paper cut art
This is a great way to decorate a plain wall in the home and is a very simple art project.
All you need is:
- Some black card
- Tracing paper
Find a design you like or make one up yourself (such as a bird cage, leaf design, butterfly – anything you like) and trace over it with a pencil and lay over the black card and secure the edges.
Then cut out the highlights and finally the edges to create a gorgeous paper cut art style and stick to your walls.
Learn more: https://www.happybarnet.com/crafting-challenge-blogs/2018/4/8/paper-cutting
6. Paper plate owls
This is a great crafty project to do when you have some paper plates lying around.
Simply take two paper plates, cut one in half and orange at the sides to form wings. Then decorate the plates, adding eyes and a beak. Use this to try out different techniques such as sponging, printing and decoupage.
7. Book edge decorating
Take an old book and turn it into a quirky work of art by decorating the page edges.
Lie the book flat then push the pages back to form a step, hold in place with bulldog clips then paint the edges of the pages. You can also practice gilt edging and more intricate designs.
Leave to dry then remove the clips and enjoy your quirky handywork! This is one of the coolest art project ideas for kids.
8. 3D sculptures for walls
This is an interesting technique to explore 3D art. All you need is a shoe box, some expanding plaster/foam, and an object – this could be a toy, an ornament, your hand or foot – anything you likened place in the box.
Fill with the foam and allow to set, then carefully cut around the edges to reveal two half sculptures.
Have fun trying out different objects and decorate them after.
9. Monoprint ink technique
This is a great technique to try out a new artistic style.
All you need is:
- A piece of glass or plastic acetate
- Ink & roller
- White paper
- An image from a magazine or comic
- Ball point pen
Take the glass and cover with the ink using the roller, (be careful not to place your hands anywhere on the glass or main area from this point onwards, only hold on the edges.)
Place the blank piece of white paper over it, chose your picture from a magazine or comic and put that on the top, tape it all down so it doesn’t move, and then with a ball point pen, trace the lines of the image you want.
Then remove all the layers, leaving the white piece of paper and you will see your mono print image. Clean the glass and then use again to create more images.
More info: https://hickmandesign.co.uk/resources/printmaking-guides/monoprinting-process/
10. Drawing pin art
This is a simple way to create pictures that literally stand out.
All you need is:
- A canvas
- Lots of drawing pins or colored seamstress pins
Then either sketch out a design or go freestyle and create and sculpture the image you want. Spell out names and dates out quotes to make unusual art gifts for friends and family.
11. Lego box art
This is a fantastic art project to frame your favorite Lego character.
All you need is:
- A lego character
- A square box frame
- Some background images
- Glue
Then open your frame and take the back card out. Place a thick piece of card over it and put to the same size.
On your piece of card, stick your Lego character on, and also add any images – such as POW!!! in cartoon letters, more Lego scenery, a city image, a quote – anything you like! Glue it all in place and leave to dry.
Then put the frame back together and there you have it, your perfect piece of Lego art!
12. Sand art
This very cool form of artistry is perfect for concept work and getting into a creative vibe.
All you need is:
- A large tray (as big as you can find!)
- Sand
- Water
- Camera (if you want to keep your art!)
Then spread the sand in the tray and spread out like a canvas and add some water to the sand to make it stick.
Try out different pressures on the sand and mould it into something you like. Be sure to take pictures as you go along as they won’t last forever in the sand.
13. Make a dream catcher

The ancients used to swear by dream catchers, believing that dreams were always meaningful and are there to learn from and to help understand life.
All you need is:
- Some willow or vines
- Some string
- Feathers
This can be a little tricky, but you need to fold the willow into a circle and secure with string.
Then start tying the string around the edges, making loose even knots on the way around and leaving a hanging loop at the top.
Then begin a second row, placing each stitch around the loops from the first row, pulling tight as you go along.
Continue doing this on subsequent rows, working your way to the center and creating a spiders’ web out of the string until you reach the center.
Leave a small hole and tie the last stitch twice to secure. Then tie your feathers to some more string and attach to the dream catcher.
You can do this with any colors you like and add things as you go along. Then hang it above your head so it can catch all your dreams ready to analyze in the morning.
14. I want to be a tree…
Think of the green man as his face emerges from the tree… What would you look like if you were entwined with a tree? Or even a flower?
Have fun merging these two images, entwining your limbs with the branches and the leaves or fruits with your features. Take full inspiration from nature and do this in a park or woods and immerse yourself in this style of art and see what you come up with.
15. Rorschach Art
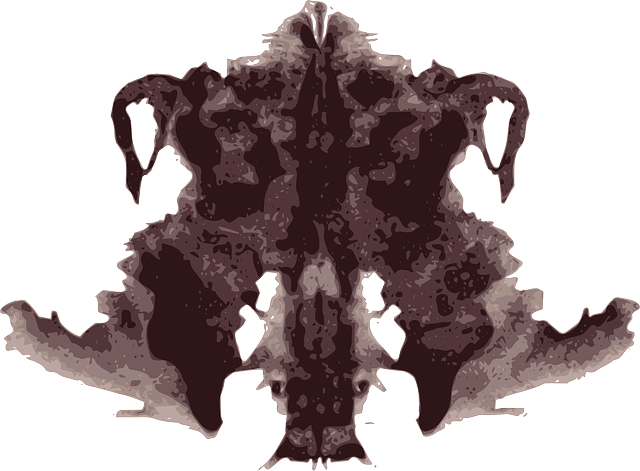

Rorschach made these images famous with his inkblot tests. Based on what you see in the images; this reveals your inner state of mind for all to see.
Have fun making your own inkblots either as art or to use them to test people!
All you need is:
- Some thick paper
- Ink (any colors)
Simply fold a piece of paper in half and open half way, then pour a little ink on one half of the page, anywhere you like – either randomly or in a pattern of your choosing. Then fold the paper over and press down to ensure the ink is as evenly matched on both sides. Then open up and leave to dry. Also try mixing different colors of ink and seeing what happens here.
16. Jumper cushions
Everyone has a favorite old jumper they just can’t’ bear to part with, so why not turn it into a cushion?
This is a very simple sewing task; all you need is:
- Your favorite jumper
- Some needle and thread
- Some large buttons
An inner pillow (roughly around the same size as the body of the jumper)
Start by turning the jumper inside out, cutting off the sleeves and hemming and sewing up the neck and sleeves. Turn the jumper the right way out and insert your inner pillow. Then sew your 3 buttons on the back inside of the jumper, cut three matching holes in the front (remembering to hem the holes so they don’t fray) and there you having it – a lovely snuggly jumper fusion made with your favorite jumper.
If you like you can also reattach the sleeves to either side of the jumper and tie into a knot at the front to make it even more huggable!
17. Zen brush strokes
This is an amazing art activity to both practice your brush strokes and to let your creativity flow.
All you need is…
- A large piece of paper or canvas
- Various paint brushes
- Black paint
Then you can either model this on traditional Buddhist art or lettering, or just go with your flow and create something from your mind. Have fun with the paint and lines and curves and try different strokes, lengths, sizes and forms and create your own Zen masterpiece.
18. Decorate some bongos
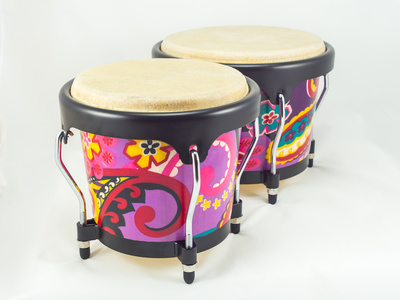
If you like a bit of drumming (or even if you don’t!) why not get yourself a pair of bongos to decorate?
Use acrylic paints to customise your drums to however you like, you can even add tassels and feathers (or even a bit of sparkle).
This is a drum you can keep and play or just use as a cool ornament.
19. Nail art
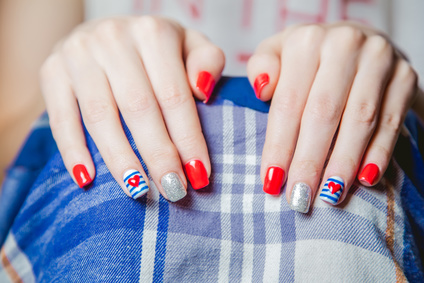
This is no longer the domain of beauty salons, all over people are embracing the mini canvases on the tips of their fingers and getting creative.
Try different styles, paints, brushes and colours and be sure to take pictures after – your very own nail art gallery!
20. Make an oilcloth
If you have a favourite duvet that is too pretty to just lie on your bed, consider making an oilcloth from it.
You’ll need a box frame to stretch the fabric across and linseed oil. Stretch the fabric evenly on your frame and coat the cloth several times in the oil allowing it to dry fully between each coat.
This isn’t the PVC coating that mass-produced ‘oilcloths’ are coated in. This is a proper old-fashioned type. The more coats you put on the more water resistant it becomes.
21. Make a clay pot
If you fancy getting your hands in some clay and being creative without recreating a scene from Ghost, get yourself some clay from a craft shop.
You don’t need a potter’s wheel to make a basic shape; think bowls, ashtray platter.
You can roll the clay into a long sausage shape and coil the clay to make shapes, roll it out flat and cut out using a craft knife with a template, or get in there and freestyle with your hands.
Just clear yourself an area, make sure you have some water to soften the clay. If you want to add patterns to the design you can use household items (just make sure they are washable) to imprint onto your clay.
You can also paint or glaze your piece if desired.
Leave to dry for 3 days.
22. Drawing pin dragon eggs
If you fancy yourself as a mother of dragons, you need your own dragon eggs.
All you need is:
- A large polystyrene egg
- Lots and lots of drawing pins
Then in neat rows, add the pins to the egged layer them together to look like scales. Keep going until the entire egg is covered, and then you can either keep plain or paint with a clear varnish to get the eggs different colours. Just hope they don’t start hatching!
23. I am a superhero
This is a great drawing activity where you can literally do anything you like! Create yourself as a superhero character. What would you wear? What would your super powers be? What would be your colours and where would you live?
Have fun creating your character and don’t forget to give yourself a really awesome name!
24. Coaster photos
This is a great project to find unique ways to display photos around the home.
All you need is:
- Plain cork / coaster squares
- Some pictures in a square size (Instagram size is perfect!)
- Glue
- Clear nautical varnish
Then simply glue your images to the coaster squares, leave to dry then coat with the clear varnish, leave to dry again and there you have a picture perfect set of new coasters. You can even liven up only coasters doing this or make them as gifts for friends.
25. Tie dye t-shirt
This old trick never gets old and is the perfect way to liven up an old t-shirt.
All you need is:
- A t-shirt
- Some fabric dye
- some rubber bands
Then simply bunch up the fabric and tie with the bands. Dip the ends in different colored dyes and leave to dry. Then un-tie the bands and you have your own awesome customer designed tie dye t-shirt!
26. Mug art
If you have some plain white mugs lying around, this is a great way to inject a little fun into them!
Simple get some sharpies, decorate the mug as you wish then place in the over at 200c for 45 minutes, leave to cool and you are now the proud owner of a custom designed mug!
27. Light bulb art
This simple art project will literally light up the room! All you need is a light bulb and some sharpies.
Then add some colour to the bulb, add patterns, or even go all out tiffany style… use your imagination! Leave to dry a little so you don’t smudge it then place it in the socket.
Switch on the light and stand in awe at how your little piece of art changes the entire space.
28. Bean tin candle holders
This is a great little project for garden parties and summer nights.
Wash up some old bean or soup cans and grab a sharp pointy thing and carefully piece holes in the tin. Do this randomly or create patterns and then add a tea light candle, light up and place around the garden.
They look lovely and twinkly as the light bounces off the tin and create a lovely rustic feel to the garden.
29. Paper marbling
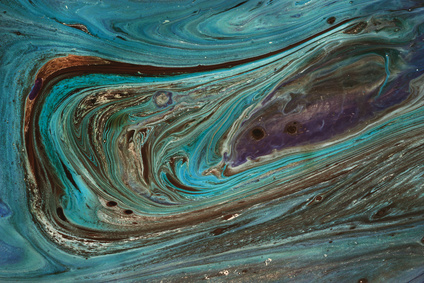
30. This interesting technique is not only fun to do, but it gives some amazing results.
Just get a tray, add a thin layer of water and add some oil based ink.
Lay a piece of paper on the top then lift it up to create images or try dragging a comb through it to get different results. Experiment with different colours and textures of paper then leave to dry.
You can either just enjoy the technique or use this to create backgrounds to layer images which you can then build up as you wish.
31. Bubble blowing
This fun art project will take you back to your childhood as you explore this technique.
Simply get a page, some thin straws and some ink. Draw some ink into the straws and then blow ink through a straw across the paper. Try different colors and see what images you can paint with your breath.
32. Record flower pots & bowls
This is a really funky art project and it literally takes minutes.
Get some old vinyl records, a terracotta flower pot or heatproof bowl and heat the over the 110c. Place the records center over the pot or bowl and then add a weight to the middle (use blind baking beads or a muslin filled with dried beans) and place in the over.
Leave for 5-10 minutes, checking regularly for floppiness and removed when fully floppy. Quickly shape the record to ensure it has a flat bottom and even sides and then leave to dry again.
Remove from the pot or bowl and there you have it – an awesome new addition to the home!
33. Deconstructed flower art
This project is very simple, just take any flower and carefully pull it apart, the petals, stem, leaves etc.
Then arrange on a page in an abstract form and then use this as a still life to paint the image you have made. Try this and change the colours around and play around with it. This is a lot of fun and creates some amazing images.
34. Petal paper art
This project is fun and messy but the results are lovely!
Get some old newspapers and shred them up as think as possible and leave to soak for 24 hours in a bucket of water. Using a handheld food whisk, whizz up the paper and water until you have a pulp like consistency.
Remove a handful of pulp from the bucket and squeeze out the excess water to form a ball and then using a rolling pin, roll out the ball for form a flat surface around 3mm thick. Add flower petals and arrange as you like and press in to the pulp to fix them. Leave this to dry out and you will have a gorgeous rustic style piece of petal art.
Trim the edges if you wish with a Stanley knife once it’s dry to stick to a card or add to a frame.
35. Stained glass windows
This is a great project if you like colour and clean lines!
All you need is
- a sheet of acetate or glass,
- some sweet wrappers (just the coloured part) and some clear glue.
Use the wrappers to create stained glass or Tiffany-esque style designs. This technique is great for exploring geometric shapes and symmetry in your art work.
36. Melted crayon art
This project is good for exploring 3D art and looking at sculpture as well as textures.
Get some wax crayons and melt them down in to a liquid form and then using a canvas or thick card, pour, paint or shape the wax across the space. Build the image up with fresh layers to create stunning scenes, or create psychedelic art.
37. Kinetic sculptures
This is a larger scale art project that is fantastic for exploring moving art and sculpture.
Find an object that has movement in it as a base, this could be a bicycle wheel, a windmill, or even make something – as long as it has movement.
Then taking objects such as paper cups, cardboard wing shapes – anything that catches the wind and attach to ensure it moves with the wind. Add to your sculpture in any style you like as long as it does affect the movement. Have fun playing with different objects as your sculpture evolves.
38. Art journaling
May people keep a journal or diary and write about their day, life – everything, but how about doing this differently and journaling with art.
Get a fresh drawing pad and use this as your journal. Log the dates at the top and then rather than write about your life, draw or paint it instead.
This form of expression can be interesting as a keepsake and also helps you get in to a daily creative flow.
39. Paint to music

This is an interesting technique if you want to explore rhythm and art. Simply choose some different types of music, your favorite songs, classical pieces, pop songs and heavy metal and draw or paint as you listen.
You can either paint the way the music makes you feel, the meaning of the song, paint to the beat or just have it on in the background, whatever you feel like doing.
Explore how and if the music affected your artwork. See if there are correlations between the music style and the end result.
40. Share art with balloons
This is a beautiful and simple way to share your art work with the world.
Simply acquire a balloon filled with helium, place a micro work of art in an envelope and attach securely to the balloon.
Write a little message on the card to the finder saying something positive or funny. This is a fantastic way to practice the selfless act of kindness and share your art with new and unexpected people.
41. Plywood art
Take a piece of plywood and cut it into 5 mm strips and place them on their side and lay them on a sheet of card.
Cut them all into squares and lay them on the card with the stripes in alternate vertical and horizontal positions and make a checker board pattern.
42. Potato sculptures
Potatoes are always in plentiful supply and they actually make a perfect base material with which to practice your sculpting skills.
You can also use sweet potatoes, which also give an amazing orange color.
Simply peel your potatoes and dry them off, then taking a sharp knife or French peeler, begin to practice cutting into the potato to make different shapes.
Google images online and look at different techniques.
People have created works of art using this method, and the best part is, if you make a mistake – you just grab another potato!
43. Light switch art
Most light switches are very dull.
Often they are plain white plastic that can look grubby over time. These little canvases are the perfect place to use your sets and crafts skills in the home. You can either paint them, decoupage them, spray paint them or even expand around them to create feature pieces.
This simple art exercise is great fun and you can cover with a clear varnish afterward to ensure they are easy to clean and will look fabulous for longer.
44. Typographical sculptures
Using ordinance survey maps, using tracing paper, trace around the red lines and then scan your tracing into your computer and scale to the size you want.
Then print this out on to card (any color). Then find the point on your map of the lowest level (sea level) and use this as your base layer and cut it out.
Then simply repeat the process by tracing the red lines, scanning in and printing out and then layer them over each other. You can keep doing this until you have exact replicas in 3D scale against the map.
Choose your favorite places in the world or mountains and enjoy the process of creating your sculptures.
45. Google earth sacred geometry
This is a great project if you like combining geometry and art.
Simple go online to google maps and take a view of the world as you wish, this could either be a country, a nation, continent or the entire world.
Print out the image on the paper and get your ruler and a pencil out. Now pin point places of interest or famous places around the world on the map, and then try joining them together to create images.
You can make simple squares, rectangles or star shapes, as well as exploring more complex geometric shapes such as the plutonic solids. Print out images of the plutonic solids from the internet then trace them over the Google map.
Layer them over each other to connect places and see what happens. This helps to expand your mind and see the correlation between natural form and patterns, as well as being a very interesting exercise in itself!
46. Body painting
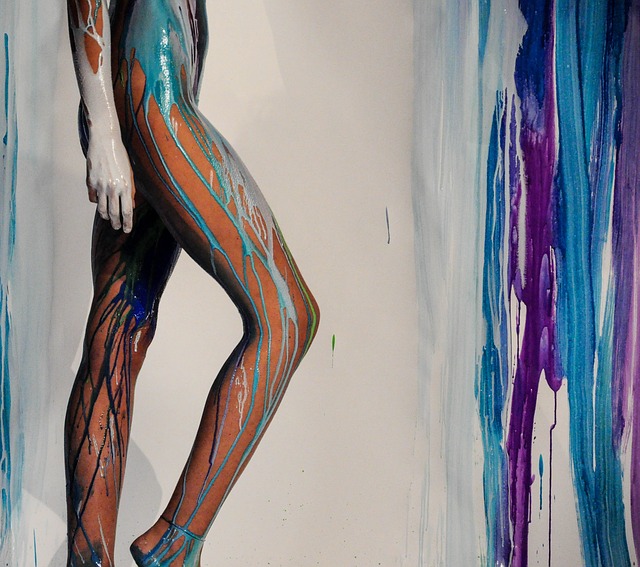
Body painting is an ancient art form used for centuries as part of ceremonies and rituals. All you need for this is a willing body (or practice on yourself) and a lot of body paint.
You can approach this in a number of different ways to get different results. You can try completely free styling and seeing what happens, you can recreate clothing, famous works of art, or even create a tattoo effect.
Use different brushes and sponges to get the effects you want, and try blending and adding layers to create shadows that emulate realistic designs.
You can also get hold of UV body paint now, meaning you can paint some amazing designs and then go dancing the night away somewhere that has UV lighting.
Make sure you have lots of wipes handy for wiping off little mistakes!
47. Patchwork
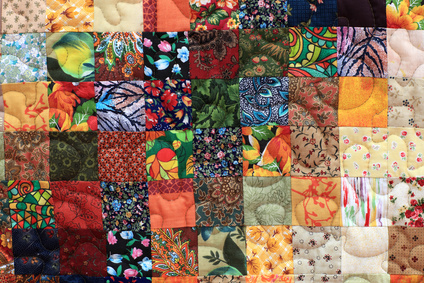
Patchwork is a great project for when you have lots of bits and pieces of fabric lying around.
All you need is:
- Bits of fabric
- Scissors
- Sewing machine/needle and thread
- Backing fabric – plain
Then all you do is cut the fabric into the same size squares and sew together using your chosen method. You can make this as big or as small as you like, making anything from cushions to quilts.
48. Resin paperweights
This is a fun and easy art project that you can do at home.
All you will need is:
- Some resin (craft stores sell these)
- Some molds
- Some interesting things to pop inside
Simply use the resin as per the instructions and set into the mound. Add any items you want in the mound such as flowers, trinkets or even toys such as Lego men! Leave to set and there you have a very simple and very cool custom paper weight!
49. Make your own Zen den
This is perfect for creating a small space in your home in which to escape from reality and drift off. You can either get a small plain childs teepee from a craft store or online, or use a teepee pattern and some bamboo sticks to create your own.
Then using fabric paints, decorate the tent to your preferences. Add feathers, wind chimes, flowers, garlands, fairy lights and whatever else you love until you have created a beautiful base.
Gather your favorite cushion, a scented candle, some crystals and set them out inside your Zen.
Then place your teepee somewhere quiet, sit inside it and enjoy your little slice of peace.
50. Brass rubbing
This simple art technique is a great exercise in working with wax and textures.
All you need is
- some paper
- some wax crayons
- a map of interesting places to visit
Try and find old or historic buildings such as churches as these often have lots of brasses on tombs and plaques. Simply place the paper over the brass and rub gently and evenly with the wax crayon (or even chalk) until you have a replica on your page.
You can then use them either as replicas in their own right, or play around with different rubbings to create a larger textured piece of art. This works well with different colors, or for a more regal effect, use glitter crayons in gold and silver.
51. Mind mapping
This is a great art project for getting all of your ideas out of your head and on to paper.
Take a large sheet of paper, some pastels, oils or sharpies and begin to create a visual image of your mind on paper. You can do this by merging cloud shapes together to form a brain-like image, or go more abstract and portray the calm or chaos within.
This is great for when inspiration is clouded by day to day thoughts as it clears out all the stuff to make way for the creativity within you to flow.
52. Movement images
This art technique is almost the opposite of a still life.
So rather than try to capture a still image on the frame, you seek to recreate movement.
This could be people moving, trees blowing in the wind, any subject involving movement is good. Experiment with blurred imagery that still captures the essence of the subject but in its free flowing form.
53. Chaos art
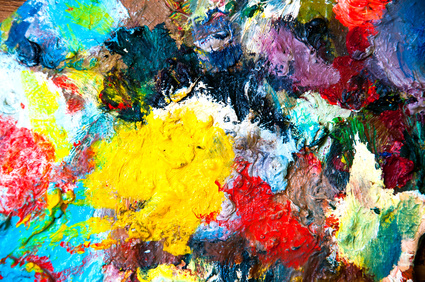
This is not one to hold back on, this is where you gather supplies and create a chaotic piece of art in full free flowing form.
Don’t think about what will go and what will ‘look good’, just try everything and see what happens. Mash up paints with fabrics, abstracts with perfect oils, layer, build and create a chaotic piece of art in any form.
This is a great way to find your artistic flow and enjoy art for the sake of art.
54. Redactive poetry
Take a page from a book – any book including a novel, poetry book, text book – anything, and then take a black marker and starting from the top, read down and cross out / highlight words as you go.
You can do this randomly or look to create your perfect poem.
This is great for card making if you can spell out something special for family and friends. Just cut it out after and stick to a card to make a truly unique and poetic gift.
55. Funky Pom Pom flowers
This is a fun and simple art project that will look amazing at home as an abstract flower display.
All you need is:
- Some clean twigs all around 30cms
- Lots of fluffy pom poms
- Some glue
Then simply stick the pom poms to the twigs. You can do these matching colors, or go all out rainbow style! Then either display in a vase or give as a gift to a friend who will appreciate this funky gesture.
56. Egg painting
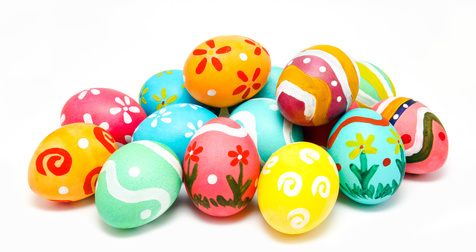
This timeless art idea is still fun no matter how old you are! These also make great places settings for dinner parties.
Simply make a small hole at either end of the egg and blow out the yolk. Then wash the egg and leave to dry (being very carefully!)
Then place in an egg cup to hold still and begin painting your egg. You can make all kinds of funky designs, or if you have some gold paint, try recreating a Faberge egg (this will be a lot cheaper than an original!)
This is also amazing to do with ostrich eggs as you have a larger surface to work with. You can add a clear varnish after to seal in the designs and they will make amazing and unique ornaments.
57. Scrabble art
This is a fun project to make personalized frames and is very easy!
All you need is:
- Lots of scrabble letters
- Glue
- A box frame
Then using the letters, spell out anything you like, ensuring that you do this in scrabble style with each consecutive word crossing through another. You can use this to make quotes or spell out names.
If you don’t have lots of scrabble letters, just print some out from the internet to make a flatter version.
Then glue them all down, add to the box frame and there you have your fantastic piece of scrabble art.
58. Make a mix tape

Or a CD even…
This is a perfect personalized gift and all you need is a black CD and a blank CD case.
Record all your favorite songs or their favorites, read poems or record messages. Then using sharpies, write on the CD or decorate as you like. Then make a piece of cover art (the same size as the CD case) and write a message or contents on the inside sleeve.
This may seem old fashioned in the digital age, but this is a lovely art project that someone will really appreciate.
59. Micro art
This art technique explores the smaller things in life.
Take a small subject, this could be anything as long as it’s very small, e.g. a toe, lips, a petal from a flower, a pencil tip – anything small that you would normally paint as a whole.
Then take your canvas and make the macro the whole piece. Explore the tiniest details of your subject, the curvature, the shadows and recreate it on canvas.
This is a great technique for understanding the detail in your art.
60. Macro art
This technique requires a starry night, a warm blanket, a flask of tea and a sketch pad and pencils/paints.
Lie down and look up at the stars and draw inspiration from this for your art. Try to see and feel the vastness of space and explore ways of capturing this on a page.
You could also place space dot to dots and have fun creating weird and wonderful shapes and faces from the stars.
This is a lovely technique that you can have fun with and bring added dimensions to your work.
61. Flower Crown / Seasonal Wreath
Celebrate the seasons with your own unique crown or wreath.
All you need is:
- Pipe cleaners or a metal hanger
- Fresh flowers and foliage
- Some green string or cotton
Flowers are said to be the enlightenment of the plant and it’s easy to see why. A green plant will burst into life and produce a colorful, fragrant little gift in the form of a flower that makes us want to stop and admire it.
Throughout the year there are so many varieties of flowers all around us and this simple art project will bring you closer to nature as well as creating a little bit of beauty in the world.
Bend the pipe cleaners or hanger to form an enclosed circle then simply add the flowers and foliage in layers, tying on with the cotton to keep in all in place. You can use this to make a crown or a wreath and it’s easy to change with the seasons. Spritz with water to keep it fresher for longer.
62. Happy cards – love yourself every day
This is a lovely art project that will bring a lot of joy to you and others the more you use it and add to it.
All you need is:
- 10 + black card shapes (approx 15cms x 10cms)
- A pack of crayons, sharpies, oil pastels, etc
- A calligraphy pen
To start with gather 10 cards, or cut an A4 piece of card into 4 pieces. Take your pen and write a word or sentence on the top or bottom of the card. Think of happy words like love, joy, laughter, peace and happiness.
For the sentences, add your favorite quote, some song lyrics or something motivational and inspiring like… I believe in myself, I am happy, I believe I can fly..etc. Anything that will produce a positive feeling or make you smile.
Then on each card under or above the words, draw a picture of something that goes alongside the words. It could be anything; your favorite fruit, a flower, a book you love, anything that pops into your head. Even a bright color or abstract will look amazing.
Then each day, or when you feel sad, pull a card and keep it with you for a while. You can keep adding to your happy cards, and share them with friends and family too. Stay happy!
63. 3D Art – for art that likes to stand out
This very simple and creative technique will give your art projects a lift in more ways than one.
Have you ever been painting and you just wanted to lift your picture off the canvas and mold it into life? Well here is a way you can achieve this and have a lot of fun in the process.
All you need is:
- PVA Glue
- Shaving Foam
- Paint or food coloring
Mix the glue and shaving foam together (50/50 mix) and add some paint or food coloring to get the color you need. Repeat this with a few different colors and get painting. You will be amazed as your project springs to life.
64. Still Life – all is not as it seems
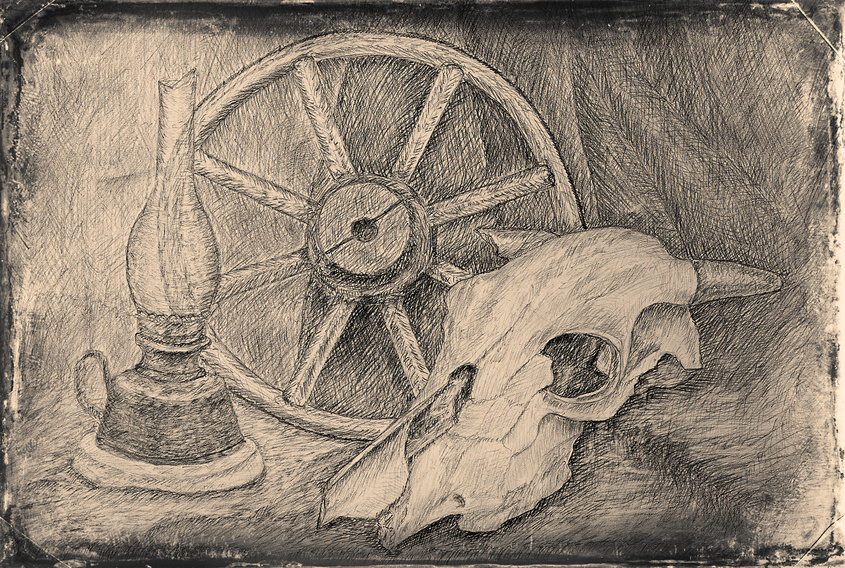
The simple beauty of this art is that anything can be your muse.
Still life is a great way to practice techniques using different materials such as paint, charcoal, oil pastels, pencils and more.
All you need to do is choose your muse; be it a bowl of fruit, a nature scene, a friend (if they can sit still long enough) and grab a sketch pad. Spend some time looking at your scene to see what you want to bring forth in to your work.
Try and see your still life as a living, breathing being, and try and capture the essence of it in your drawing or painting. It is said that Van Gough never ever saw just a chair… he saw the essence of a chair and this is what makes his paintings masterpieces.
This is also a perfect way to use art to unwind and be in the moment. Whilst you are creating art, you are creating love.
Get some still life drawing inspiration here.
65. Shoe wings – get a little spring in your step
This funky art project is great for when you want to add a touch of magic to your feet! Simply choose a fabric you like, choose some shoes you want to use and you’ll be flying.
All you need is:
- Some funky fabric
- Cotton Wool
- Scissors
- A needle and thread
Draw a shape that you want the wings to be (approx 10cms x 10cms) and cut out 8 matching wing shapes. This can be from any fabric or even use some plain fabric from an old pillow case so you can decorate later.
Lay them all down so they are matching and simply sew two pieces together, leaving a gap for stuffing).
When you have all four wing pieces, stuff them all with a little cotton wool and sew closed. You can also sew lines into them to give more of a wing shape.
Finally, place against the shoes you want to attach them to and cut two holes in each wing. Sew carefully around the holes to keep the stuffing in and then thread through your shoe laces. You now have shoe wings and you are ready to fly!
66. Perfume petal art – pick your perfect picture
Petals are all beautiful in their own way, and flowers have been the inspiration for artists throughout the ages.
Go for a walk in nature and pick up some petals as you roam.
Take a piece of card, paper or canvas and start to arrange your petals into a design that you like. Be really creative here, the petals are the paint and you can create anything your mind can conceive… crush, cut, mold and shape your petals in to picture you can be proud of.
Use PVA glue or make a glue paste from flour and stick it all down to fix your picture. Finally, spray your picture with your favorite fragrance to give you a beautiful piece of art that smells as good as it looks.
67. Box frame collage
Create a unique memory from a holiday, day out, wedding or friendship that you can treasure or give as a gift.
Box frames are available online or at craft stores. Consider the size of the items you want to display and the area you want to hang or put your collage.
Choose small items that will fit inside your chosen frame; pebbles from the beach, sand, shells, confetti, name place cards, leaves, flowers. Add to this pictures, either from your photo collection or from magazines that fit your theme, think beach huts, ice cream cones, cake toppers, floral wall paper. You can give this a title; if your handwriting is good you can do free-hand or cut out letters from a magazine.
Combine the items in a pleasing way. The idea with box frames is to give your art piece a sense of depth. Sometimes less is more, then again sometimes more is more! It all depends on your personal style.
Glue your items in place once you are happy. You can add glitter to give the sense of water, or magic.
If you have sand you could leave this loose to allow your picture movement and create a new picture every time, add some sparkly glitter for real pizazz.
68. Mirror Art – frames within frames
We all have an old mirror lying around, if not they are inexpensive to pick up from car boot sales and bargain stores. Creating art on a mirror is essentially glass painting so you will need;
- A Mirror
- Glass paint
- Brushes
Create an image on the glass. If you still want to use the mirror, stick to the edges. It’s nice to create climbing patterns, swirling around the mirror creating a frame within a frame.
You can create scenes like creepy forests, your favorite animals or even write quotes into the mirror or around the edges.
Mirror art is simple and satisfying and easy for beginner artists as you can rub it out easily if you make mistakes and start again. Have fun making your very own mirror designed by you, for you (or for presents), it truly will be a one of a kind.
69. Family / friendly tree – mural art
This art project is ideal if you have some space on a wall at home as you can create a feature piece that encompasses your loved ones.
All you need is:
- Some paint (brown and green for a standard tree, but who says trees have to be this color anyway?)
- Some photos of your family and friends
To start off, create a tree trunk on the wall and build up your tree into branches. At the end of each branch, hang a photo on the end as if they are growing out of the tree.
You can also paint around the picture to create leaf frames. This is great as you can always add new branches and images and change the colors as your tree evolves.
70. Seasonal alter – bringing the outdoors inside
Whilst this may bring back memories of the nature table at school, there is a simple beauty to creating your own alter or nature table at home.
Try incorporating each of the 4 elements within your alter; earth, air, fire and water to create a beautiful display you can sit in front of and enjoy until the next season.
All you need is:
- A table or tray
- Items gathered from nature
- Your favorite candles or trinkets
Using everything you have gathered, build up your alter, mixing you natural items with candles, bowls of water, crystals, rocks and anything else you love.
You can even place a mirror behind it to add depth and to reflect the light of the candles. Place somewhere you pass frequently and enjoy.
This truly is an evolving piece of living art that you can nurture and develop all year round.
71. Decoupage Shoes & Bags
Do you have an old pair of comfy leather shoes you just don’t wear anymore?
Or the charity shop clutch bag that really doesn’t go with anything you have?
You have the perfect excuse to make a funky pair of shoes for a fun costume or night out, with or without a matching bag. You will need some Mod Podge decoupage glue and a water proof sealant.
Cut out small pictures from comic books, maybe some of the speech bubbles, or you can use thin wall paper, pictures from magazines, anything on thin paper.
Coat the shoes with mod podge and places the pictures on the shoes.
You want to overlap the pieces and cover the whole shoe. The effect should be a little crazy and eye catching. You can use all black and white or have a riot of color.
Put your favorite pictures on the toe to really stand out. Cover the whole piece with top coat sealant and leave to dry for the specified amount of time.
Wear with pride.
Use the same technique for your clutch bag. Try to avoid parts that need to bend/fold/move a lot or your piece will crack.
72. Quotes on canvas
We all have our favorite quotes, words and sayings that make us feel good, so why not use these words to create a piece of art that you can enjoy each day?
All you will need is:
- a canvas,
- some paints and brushes
Add decorations around the edges, or even wash out the canvas to your chosen color before you paint the quote on.
Make sure you outline your quote in pencil first to ensure it fits perfectly on to the canvas. Happy days will follow as you not only get your daily reminder as well as appreciating your art.
These make great gifts too for family and friends.
73. Family shield/motif
In days gone by, most families had a shield or coat of arms that signified their house and what they stood for.
Grab a few sheets of blank paper and some pencils and sketch out some of the ideals, animals, attributes, nature, elements and more that you feel represents you as a person, or your family.
This can be a personal project for yourself or you can do this for your family or a group of friends.
Choose maybe 3 or 4 different images and cut them out and arrange them in the shape you desire. This could be a shield, a square, circle, star or any shape you love and bring all of the elements together. Try entwining the images to get a flow and add the colours you love.
Be as creative as possible as the aim is to create all the things that you want represented in one single piece. Use any materials you like to create your family shield, there is no limit to the different ways you can present your family shield.
74. Dinky bunting
Have you got a favourite dress with a wine stain down the front?
Old jeans you no longer can pull up over your butt or just remnants from sewing projects that aren’t big enough to use but are too precious to throw?
Try creating a cute bunting.
You will need either a ribbon or bias binding tape as long as you want your bunting to have a little extra to tie off the bunting. Consider how much material you have, how big you want the bunting to be and work out how many triangles of material you can make from the resources you have.
All you need is:
- A triangle template the shape and size you want the bunting to be (around 3cms x 3cms for dinky bunting)
- Pinking shears or scissors
- Pins
- A sewing machine or needle and thread.
If you are good with a sewing machine you can hem or double side your bunting. If you want a quick, easier project just use pinking shears to lessen the fray. Or if you have denim, work with the fray to create a unique piece of art.
Lay your template on your fabric and draw around the outside. If you are hemming your pieces allow a 1cm seam all around. Consider the best use of the fabric you have and jiggle pieces around considering any pattern you have.
Cut out the shapes, if you are sewing the edges using pinking shears to create a cute border and reduce fray. You can further reduce fray buy using a fray stop spray after you’ve cut your pieces.
Once all the pieces are cut out, pin them to your ribbon or bias binding tape. Bias binding is useful as you can tuck the triangles into the crease and sew them up creating a great finish. If you are using ribbon, pin the triangles to the back of the ribbon. Take some time to make sure they are evenly spread and you are happy with the order. Then sew across the ribbon to stitch the bunting into place.
After you have finished, you can use your dinky bunting for anything such as decorating bags, cakes, hanging over a picture frame or even over your PC. Dinky bunting looks great on anything, we all need more dinky bunting in our lives.
75. Custom clothing
Use up some old lace or netting and jazz up that plain boring t-shirt in your wardrobe. You’ll need a pair of sewing scissors, needle and thread and some creative thinking.
You can add lace trim to the sleeves or the bottom or your t-shirt for a quick pick me up. You can cut horizontal lines from your t-shirt back, stretch the fabric width ways which will make the edges curl in, then use the piece of net as a backing which will show through the slits.
Refashion the neckline to create an ‘off the shoulder’ look by cutting the neckline and stretching the fabric to make it roll. Then create lace straps by pinning and sewing the lace where it looks best (one strap, two, cross over).
You can add sequins, glitter fabric pens, appliqué patchwork, fray techniques to really pimp your clothing to new levels.
Custom clothing really allows you to unleash your ideas into wearable art, and this is a lot of fun in the process!
76. Face Art – your face is your canvas
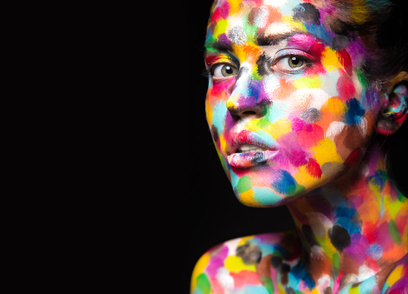 Face painting, makeup and even au natural, our face is a canvas that we always have available to us.
Over the centuries, people have used face art to enhance natural beauty, hide from people through camouflage or to express their likes and dislikes. Your face is a canvas that is full of possibilities and it is a lot of fun exploring different ways to create facial art.
All you need is some make-up or face paints and a mirror.
Start with an image in mind or allow yourself to create as you go along.
You could look to create an animal (cow, tiger, peacock – you don’t have to draw the animal necessarily, just give an impression of their patterning or use the color scheme as a source of inspiration), or create a seasonal theme (ice maiden, or summer fairy), or try a painting technique (expressionism, pop art, watercolor) and apply the theories to your make up.
This is a lot of fun and you can have hours of fun exploring different styles.
Take a picture each time and you will soon have your very own gallery of amazing face art images.
77. Rock paintings
If you’re short of some paper or canvas and fancy creating something a little more tactile, then rock painting is a great option.
There are rocks in abundance on this earth, so have a walk along the beach or through the woods and see what you can find. Once home, give them a nice bath to clean them up, get out your paints and brushes and use your creativity.
Acrylic paints work best on rocks, but you can use anything you have to hand. You can even create scenes with your rocks, paint faces on them, use them as place holders or as markers in the garden. If you need them to be waterproof, simply paint a layer of yacht varnish over the paint and this will ensure the color stays put. Happy rock painting!
78. Herb candle jars
We all have lots of jars lying around and making these herb jars is an amazing way to use them and create pretty candles for around the home.
All you need is:
- Clean empty jars
- Candle wax and wicks
- Fresh or dried herbs
- Garden twine
Take your empty jar and a little melted wax and stick the herbs in the jar around the edge. Place your wick inside as per your candle making instructions and then fill the jar with wax. The herbs will be held in place by the wax and the jar will look beautiful. You can also do this with petals and any flowers. To finish tie a piece of string around the top of the jar to form a handle and your jar is ready to display and use.
79. Funny frame photography
This project is a fun project best enjoyed with friends and family.
All you need is:
- A camera
- A large empty frame (decorate how you wish)
- Bits and pieces for fancy dress such as funny hats, scarves, glasses, mustaches and funny words/quotes (or even comic style quotes)
- A plain background
Then, take it in turns to hold the frame around yourself and pick the funny fancy dress items and take lots of pictures. The outcome will be funky and funny images you can then use to create an album or collage to hang at home. This beats the posy pics most people do and it’s a great way to spend time laughing and getting creative with friends.
80. String mobile
Creating your own mobile is incredibly easy, all you need to hand is:
- Cardboard
- String
- Anything you want to hang from it
This simple art project is perfect if you have a theme you want to work with.
For instance, you can choose a seasonal theme, make it into an alternative birthday card, use it for decorating a party or even to celebrate your favorite things.
To start with cut out a circle approx. 15-20 cm. Use a sharp object or pin to create 6 evenly-spaced holes around the edges, and one in the middle.
Decorate the circle however you wish, leave to dry and then thread the string through the 6 holes and tie a loop knot in the middle to allow for hanging.
You can cut the strings to however long or short you like, however this also works well when they are divided into different lengths, try one short one long alternating between the two, or try them in a circular ascending / descending order.
For the mobile pieces, add small pictures, images of your favorite things, items from nature, postcards, small toys or anything that makes you happy or the recipient happy. This is your own little mobile that you can use to express yourself and the things you love or to share the love with others.
81. Stress balls
Are you feeling stressed out?
This amazing simple project will help you relieve your stress and enter the Zen zone…
All you need is:
- A bag of flour
- Balloons
- A small funnel
Simply pour the flour in the balloon until it’s as full as possible then tie to seal. Then hold your stress ball in your hand and squeeze the stress away.
82. Hat decorating
Make yourself a cool custom hat with this fun art project.
Take a plain baseball cap, then sew a piece of ribbon all the way around in your chosen color. Then take smallish items such as flowers, badges, pins and sew on to the ribbon to secure.
You can also swap and change things as you like, making sure your hat is truly one of a kind!
83. Tie dye your pillowcases or socks
Purchase some Dylon fabric dye in the color of your choice (the darker the better).
Tie some elastic bands on around bunches of fabric super tight (various tie-dye patterns can be looked up online)! Then, simply leave to soak in your dye for the recommended time.
84. Faerie glow jars
Grab some unused mason jars and some large glow sticks in the color of your choice.
Cut the glow sticks open and allow the liquid to drip down the sides of the jar.
Add a few drops of water to extend its glow life.
Add a lid and voila!
Should glow for up to a week… Perfect for parties!
85. Pressed flower clear phone case
Purchase some resin, pressed flowers (or press your own leaving flowers between books for up to a month) and a clear phone case to fit your phone.
Simply decide on your design by placing your flowers on the inside of the case using tweezers, once happy simply drip your resin over your design being careful to remove bubbles and checking the design from the other side.
Leave to dry and you have fashioned a stunning new case.
Alternatively, you can also cut pictures to size and seal them down using resin.
86. Using nail varnish to marble pots (or just about anything!)
Drip a few drops of nail varnish in the color of your choice into a bucket of water, allow it to disperse a little and dip your plant pot/item slowly into the water.
Repeat until satisfied with the result.
87. Decoupage a chair/table
Rip up a selection of paper (could be maps, newspapers, whatever takes your fancy!).
Simply paste onto your furniture of choice using slightly watered down PVA glue.
If small enough can be coated with a layer of resin.
88. Foiling
You can create a foiled card/ piece of artwork on the cheap by simply printing your design using a LaserJet printer onto paper and running both your design and your foil placed on top through a laminator.
After it has run through simply remove the foil.
89. Kebab skewer sculpture
Purchase a small polystyrene ball and spray paint it black as well as the ends of some wooden kebab skewers ever so slightly.
Stick in the ball from all angles (spikey end in the ball) and continue until satisfied with the result.
90. Photo transfer canvas
Grab a canvas and photo of choice (photocopy), coat the canvas in a gel medium and paste the image down face down.
Leave to dry overnight then spray with water and gradually rub away the image.
91. Melted wax crayons
You can create a cool piece of art by gluing a box of crayons along the top of a canvas and melting them using a hair dryer or heat gun allowing the wax to drip down the canvas.
92. Funky garden chairs
Everyone has those boring plastic garden chairs lying around, they are mostly dull and lifeless and add no visual appeal to the garden.
Change this with a pack of sharpies and some clear boat varnish.
Simply clean the chair thoroughly, decorate and color the chair with the sharpies to your own design and then seal with varnish.
The end result will look amazing and much more appealing than a boring old plastic chair.
93. Decoupage table tops
This works well on any table and any surface.
All you need is a variety of paper – look for old maps, flight charts, vintage magazines or old picture books and cut into smallish squares.
Stick them to the table using PVA glue until the entire surface is covered.
Then either paint over with clear boat varnish or even get a piece of glass cut to size to seal in the images.
This is great for old coffee tables and cheap identikit furniture to give a new lease of life.
94. Match sculptures
This is a fun art technique for those of us who like a more tactile approach.
Gather as many plain match sticks or plain sticks as possible (be sure to use the ones without the flammable heads) and create freestyle 3D art.
Use superglue (sparingly) or PVA glue to create flat images initially that you can then build up on the page.
Have fun creating images from your mind or use still life for inspiration.
Either way, you will have lots of fun creating your own match stick sculptures!
95. Snow sculptures
This is perfect for when it’s snowing and you’re feeling bored!
All you need to do is gather a big bucket of snow, grab some food coloring and a tray.
Lay the snow out on the tray and use the food coloring to change the colors. Then be prepared for cold hands (or wear gloves) as you shape your scenes. You can build mountains, rainbows, forests or even psychedelic style art out of the snow and colors.
You might also want a camera as this style of art won’t last forever!
96. Scratch crayon art
This one you might remember from school, and it’s a lot of fun to try again with a slightly different approach.
Simply draw or paint a picture on a piece of card, in any style you like.
Then completely cover the entire surface with a black wax crayon.
Take a knife or nail file and then scratch the image you like into the wax – revealing parts of the image underneath.
Have fun with this by revealing parts of shapes, creating a mesh of light and dark scenes on your page. These make great birthday card covers as you can write into the wax, making a really cool card!
97. Shadow Art
This is a great technique to use with pastels and charcoals.
Simply use some blue tack to pin some plain paper against a wall and then use a light shade and objects to create a shadow on the wall.
Then using charcoal, sketch around the shadows to create some really unique images.
98. Finger painting
We forget this simple technique, however finger painting is a great way to really get involved with your images to create something unique.
Using any paints you like, simply freestyle with the paint on your fingers and see what comes up.
The modern day equivalent (and less messy version) of this is iPad art.
There are many apps you can use to practice your art techniques, although the finger painting is a lot more fun!
99. Dream drawing
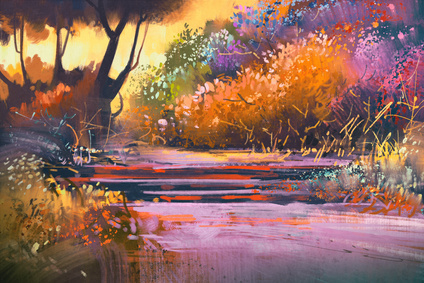
This is a very interesting art technique to try out and many famous artists are said to find inspiration in their dreams.
Take a sketch pad and pencil/chalk etc and leave it next to your bed.
The next time you wake up from your dream, try and immediately sketch it out as you recall.
Keep doing this and build a visual art sleep diary, you will be amazed at what happens!
100. Imitation art
Imitation is the highest form of flattery, so why not spend some time with an image of a famous work of art and look to recreate the image.
Study the work, brush strokes and colors.
This is not only fun, but it also helps you to develop your talents further and discover how these pieces became so popular.
101. Life size self-portrait – abstract
This is a large work of art that not only requires a large canvas but also a lot of soul searching.
Set up your canvas and paints and take a few moments to think about yourself, who you are, your life and how you see yourself and then create a life size image on the canvas in abstract form.
Try and capture thoughts and feelings and the essence of you as a whole.
This can take as long as you like and can evolve over time.
102. Old fashioned feather writing
This is great for writing or drawing.
All you need is a large feather with an intact vein and an inkwell.
Shape the end off to a diagonal and squeeze lightly to draw the ink up and start writing.
You can even write scrolls and use wax and a seal to create truly authentic look documents.
103. House signs
Create your own creative and funny house signs with this simple craft project.
All you need is:
- some MDF – any shape you like,
- a drill
- some wire
Drill two small holes in the top left and right-hand corners to enable a hanger to be made from the wire.
Then take some Cuprinol or garden paint and cover the entire surface. Leave to dry, then using a marker, write out catch phrases and funny words. Add stickers, draw on images and then finally seal with 2 layers of clear varnish.
These look great and make a wonderful personal gift!
104. Personalize your laptop
Most laptops are relatively boring.
We spend hours staring at these identikit pieces of equipment and nobody really thinks to make them personal.
You can use stickers, covers, make mosaic patterns, add photo stickers or go all out and make it a beautiful work of art.
Many places can now add your designs to covers so you can have your art work on display to inspire you all day.
105. Tile art
Most people can get hold of plain ceramic tiles, either leftovers from a project or cheaply in DIY stores.
This is a perfect little canvas and you can either use this as a canvas or create tiles to decorate a room in the home.
You can try individual tiles or recreate a pattern over many tiles. Simply use a water resistant paint and get in to your creative flow, allow to dry then seal before adding to walls in the normal way.
These create great flashes of art in the home and you can add to them or simply paint straight on to any that are already on the walls.
106. Collage your work
Collaging is great fun and especially great for when (like most artists) you have various bits and pieces lying around that you don’t really display.
Chose a large wall and build a collage of your work and ideas.
Mix in prints of your inspirations, either other artists, landscapes, your muse and more.
Stand back after and see your artists journey and keep adding to it. No art should be left un-displayed.
Learn more: https://www.digitalartsonline.co.uk/features/illustration/21-collage-tips/
107. Cup cake art
The cupcake is a perfect edible canvas on which you can unleash your creativity.
Get messy with colored icings, sprinkles, colors, shapes and create the perfect work of art cupcake.
Sculpt the icing, think abstract and take lots of pictures – this is a very fun art project and you get to eat the results!
108. Campaign art
Do you have a passion for a cause or a favorite charity?
Then create a piece of art that describes how you feel about your cause.
Be it a picture or painting, think about offering it to your favorite cause as a gift or fundraising item.
This shares your art and ideas with people who share your ideals and is a great personal project.
109. Find beauty in all things
This is a great exercise and requires a few simple items.
Your art supplies and the most ordinary, boring, non-sensical item you can find, and look at it deeply. Try and find the beauty in this item and recreate it on a canvas or paper. Even the tiniest brown pebble or a piece of old rope can have beauty if you just look deep enough.
110. Pimp your furniture
When it comes to furniture, it’s hard to stand out.
Most of us tend to succumb to chain stores like Ikea because they offer the best prices and styles. But how annoying is it walking into a friend’s home only to find the exact same coffee table in his living room?
So not cool!
If you’d like to impress your friends with an original furniture piece you’re either going to have to make it or at the very least style it yourself. Seeing as actually making furniture may require a little more expertise, just go for the styling right away!
By using fun paper collage techniques, stencils or a simple paint brush and a coat of paint, you can make even the most generic Ikea coffee table look like a special find from a designer or vintage shop.
111. Mason jar snow globes
How many glass jars do you use up on a weekly basis?
And most importantly: what do you do with them all? Throwing them out is a shame considering the many uses you can find for them.
You can turn baby food jars into darling little candle holders, or re-use bigger mason jars to store other goods in – anything from food to random buttons. But if you really want to make your used mason jar shine, turn it into a dazzling little snow globe!
The theme doesn’t have to be wintery at all – you can come up with your very own idea. Is your daughter obsessed with unicorns?
Then create the kind of landscape for your daughter’s unicorn that would make Rainbow Brite’s unicorn envious.
Has your son or daughter developed a fascination for the underwater world after seeing Finding Nemo? Then turn your mason jar into a little aquarium. All you need is a glass jar, food coloring, glycerine, plastic figurines and glitter. One of the more Christmassy art project ideas on the list.
112. Painter’s tape art
Have you always fancied creating a stunning piece of art on canvas but are put off by the fact that, well, you just can’t paint?
No worries. There are other ways around it – yes, even for those of you with not one creative vein in your body.
The trick? Painter’s tape!
Painter’s tape is really easy to rip and cut into fun shapes, making it the perfect material to use if you’re looking to create an original art piece without actually having to paint any sophisticated shapes or symbols. Choose your favorite colors and go ahead and spread them out all over the canvas. Really go nuts here – the more layers of paint and colors you use, the more texture your painting will have. Once the paint has dried, cut up strips or symbols from your painter’s tape and stick them on to the canvas.
This may take quite a while depending on the number of shapes you are looking to create. When you’re done taping, paint over the canvas and the strips again using your chosen base color. Wait for it all to dry and then carefully start removing the painter’s tape. Seal it with the appropriate varnish and your abstract tape painting is ready to be hung!
113. Custom canvas bag
This is a fantastic quick and easy art project you can do with a few simple items…
All you need is:
- A plain canvas bag
- Fabric paints or crayons
- Studs / gems
- Fabric glue
Just lay out your bag and get decorating in your chosen style, adding gems and studs to spell out names or phrases and creating your perfect handbag.
And there you have it time to get creative! If you have more creative art project ideas please let us know in the comments below.


 How to Write Poetry For Beginners: Easy if You Know How
 The Best Acoustic Guitars in the World
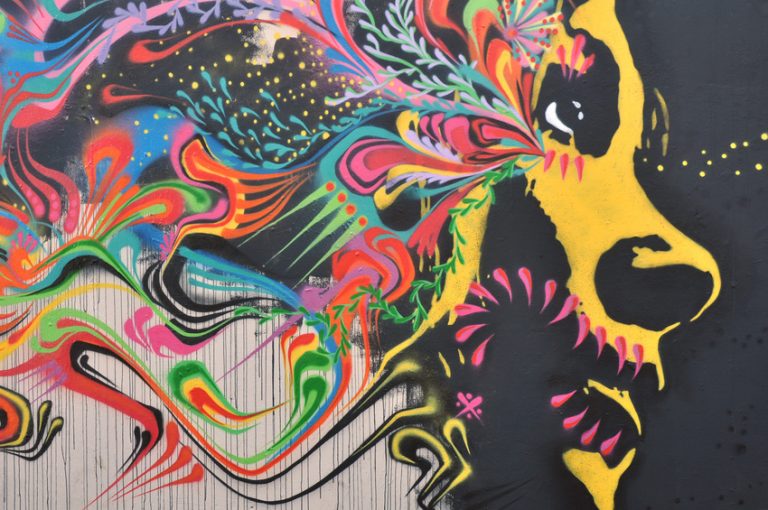 9 Super Creative Street Art Pieces
 The 10 Greatest TV Shows of All Time
 How to Play Guitar for Beginners
This is an amazing website to find all sorts of different art projects. From school to home, to work, to just plain out bored. This is the website to go to!